A new Oracle Linux 9 Vagrant box
This article is a rewrite of my older article Oracle Linux 7 Update 5 is out: time to create a new Vagrant Base Box.
For several years now, I work with an Oracle Linux 8 in a Vagrant/VirtualBox project. While Red Hat Enterprise Linux 9, CentOS 9, and Oracle Linux 9 are out for several years. I tried one of those earlier, but had troubles with the UIs of my IDEs, but no opportunity to sort that out. Now, with the move of VagrantCloud to HashiCrop Cloud Platform, a rewrite of some of those comes in handy for me. For me, a courant how to create a new Vagrant box is helpfull
Create a new Vagrant box
Download the Oracle Linux ISO
I dowload the latest Oracle Linux 9 ISO from Oracle Linux Installation Media on yum.oracle.com. Currently, it is release 9.5.
Create a new VM
In VirtualBox I created a new Oracle 9 Server with GUI VM with the following specs:
- Name: OL9SwGUI
- Memory: 16384 MB
- CPUs: 8
- HDD: 256 GB
And of course, I choose the downloaded ISO.
Install Oracle Linux 9
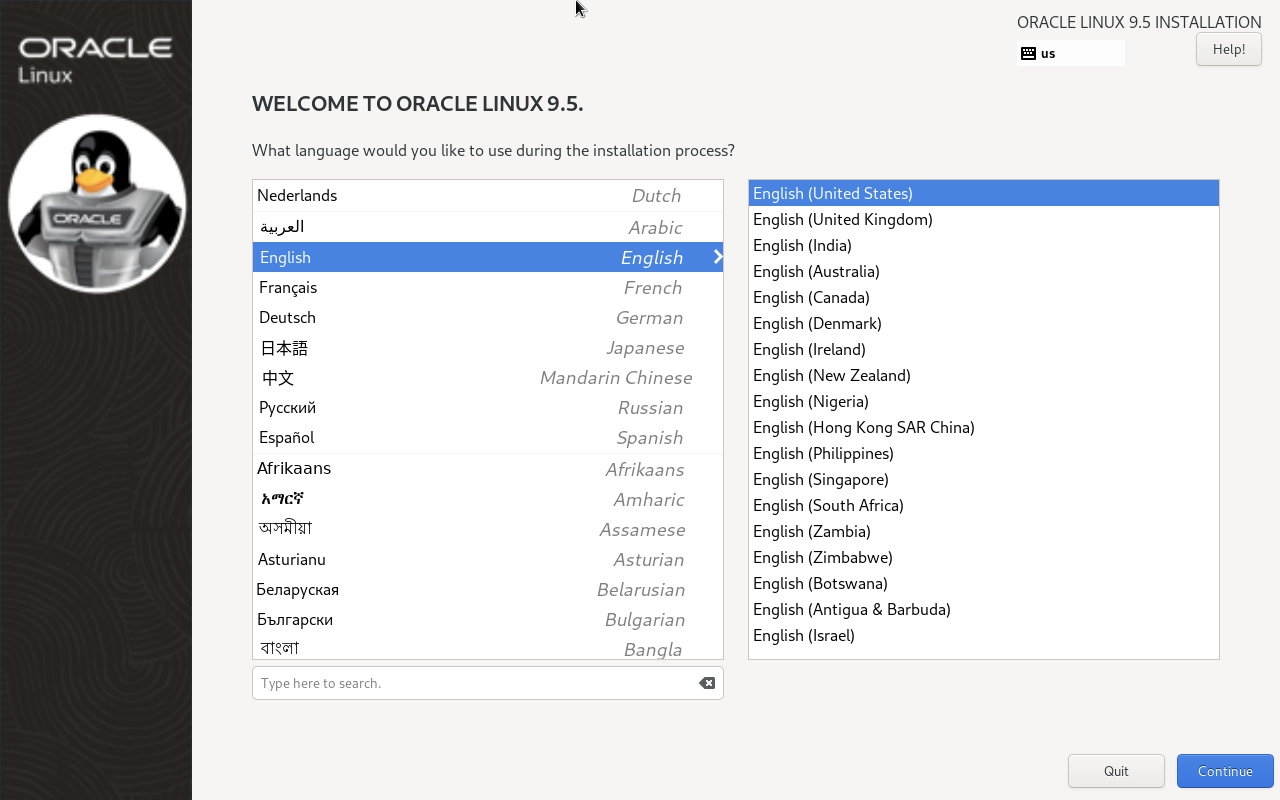
Start up the VM and follow the setup:

Then, there are a few basic options to fill in:
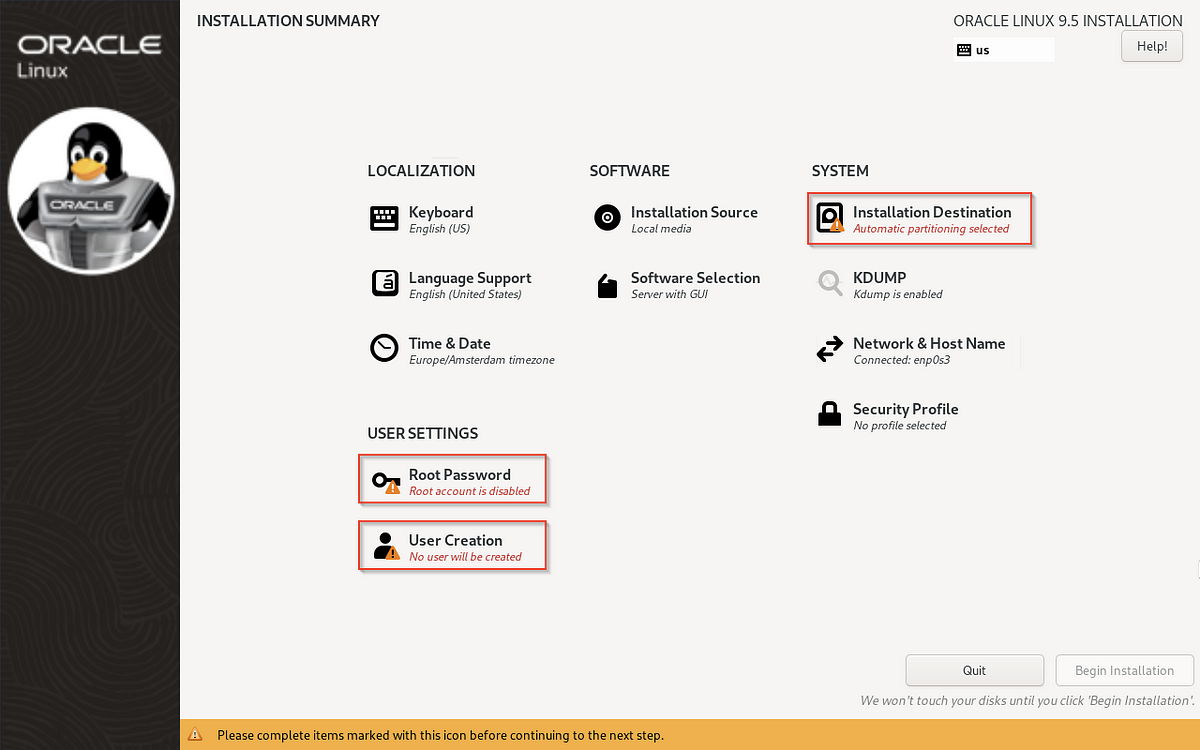
Click on the Installation Destination and choose the default options:

Then click on Root Password to setup the password options as follows:
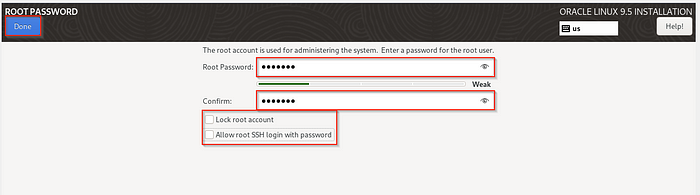
For Vagrant boxes, I use the simple (and weak) password vagrant. In most cases access is only done through SSH keys. When done, click on Done.
Then click on the Create User option:

Here, create a user with username vagrant, and the same password as root: vagrant. This user is going to be setup to do the initial configuration, so make it an administrator.
After clicking Done the OS is ready to be installed.

Then after a while, the system can be rebooted:
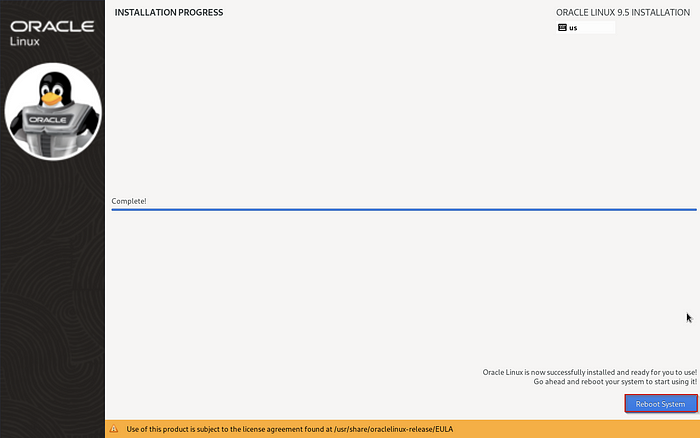
And then you can logon:

Install VirtualBox Guest Additions
When you logged on, you can insert the Virtual Box Guest Additions CD:
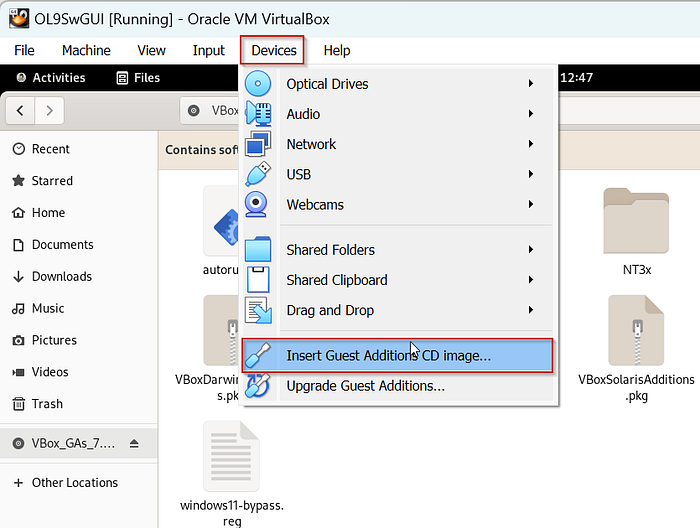
In this version, the does not automatically run the software. But, you can open the CD using the Nautilus file browser:
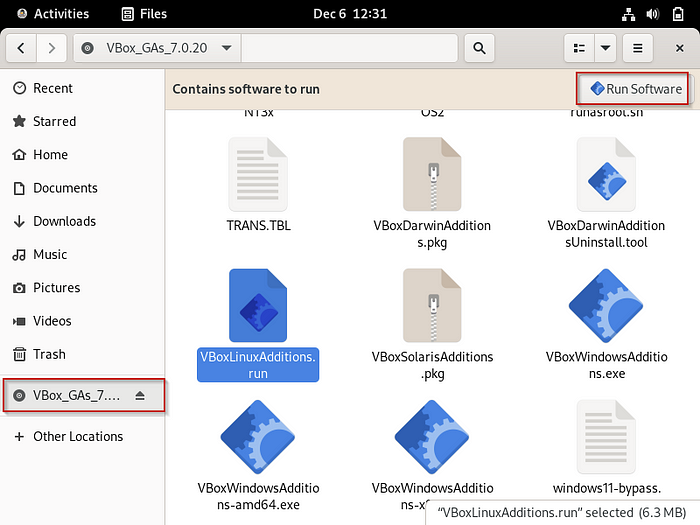
And click the Run Software button. However, on first run you will encounter:
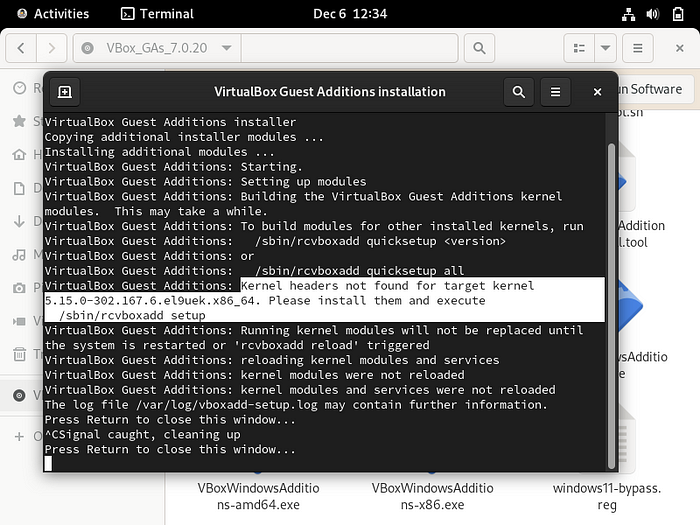
So, you will need to install the required packages. You’ll need not only the kernel headers, but also gcc, make and perl. And, I first upgraded the current packages:
$ sudo dnf -y upgrade
$ sudo dnf -q -y install gcc make perl kernel-uek-devel kernel-uek-devel-5.15.0-302.167.6.el9uek.x86_64
After this, you can try to rerun the VirtualBox Guest additions installer, above.
When it succeeds, you can restart the VM to load the new modules and activate the Guest Additions. This would allow you to copy and paste the upcoming commands easier.
Configure vagrant
The vagrant user is used for provisioners to install components. This means running scripts that perform sudo actions. And therefor, I do not want to enter a password for the vagrant user when using sudo.
So, create a new sudoers.d file using:
$ sudo visudo -f /etc/sudoers.d/va. grantWith the following content:
vagrant ALL=(ALL) NOPASSWD: ALLNext, Vagrant will use the vagrant user using an SSH-key. For boxes, an insecure SSH-key is used, that is replaced with a freshly generated secure key, upon first connection withn the VM. So, create a new .ssh folder with the authorized_keys file:
$ mkdir ~/.ssh;vi ~/.ssh/authorized_keysPaste the contents of Vagrant’s insecure key from https://github.com/hashicorp/vagrant/blob/master/keys/vagrant.pub into the file.
Package the box
With this you can shutdown the VM to package it.
Having the VM shutdown, open a command prompt, or commander window, to check the folder where you have your VMs:
 λ dir C:\data\VirtualMachines\VirtualBox\
 Volume in drive C is System
 Volume Serial Number is 0EDF-C0B5

 Directory of C:\data\VirtualMachines\VirtualBox

05/12/2024  15:18    <DIR>          .
11/01/2024  11:14    <DIR>          ..
04/12/2024  18:41    <DIR>          OL8_Develop_v1
15/05/2024  12:35    <DIR>          OL8_FMW14c_v1
06/12/2024  13:53    <DIR>          OL9SwGUI
               0 File(s)              0 bytes
               5 Dir(s)  158.652.293.120 bytes free
Then package the box using:
λ vagrant package --base OL9SwGUI --output C:\data\Vagrant\boxes\OL9SwGUIv1.0.box
==> OL9SwGUI: Exporting VM...
==> OL9SwGUI: Compressing package to: C:/data/Vagrant/boxes/OL9SwGUIv1.0.box
This may take a while.
Upload to Vagrant Registry
The Vagrant cloud is moved to the Hashicorp Cloud Platform (HCP) recently. Therefor I had to claim my registry in HCP. Since I ignored the announcement-mails for a few weeks, so it was a bit of a struggle. So, I won’t explain how to do that here. But, I got it right.
Get to the HCP portal, at https://portal.cloud.hashicorp.com/.
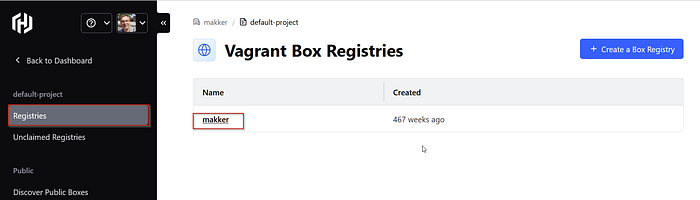
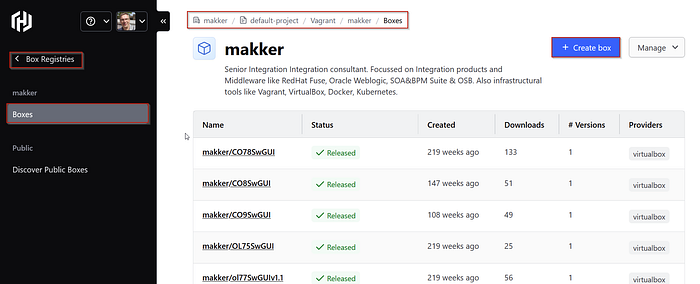
Then, choose your project and the Vagrant registry:

Then click on your registry:
In your registry, click on Create box:
This launches a four-pane wizard, starting at 1 Define your box:
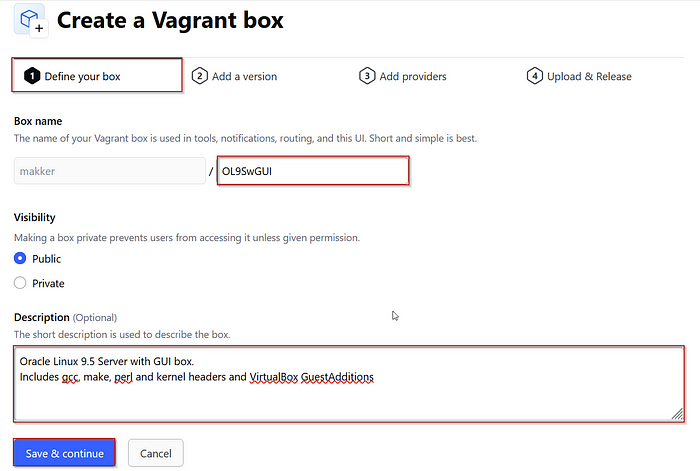
Provide a proper name, and description. And click on Save & continue.
This leads to the 2 Add a version pane:
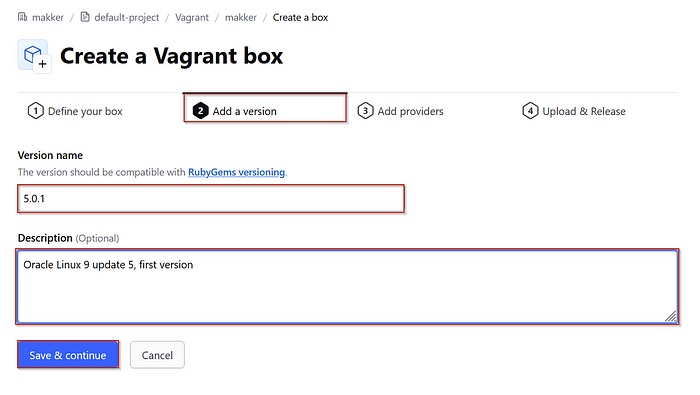
Since, I’m not doing this often, I do not have a version strategy. Today, it felt logical to start with the 5 of the Oracle Linux 9 Update version. Then this is the first minor version of this box. Again, click on Save & continue, which leads to the 3 Add providers pane:
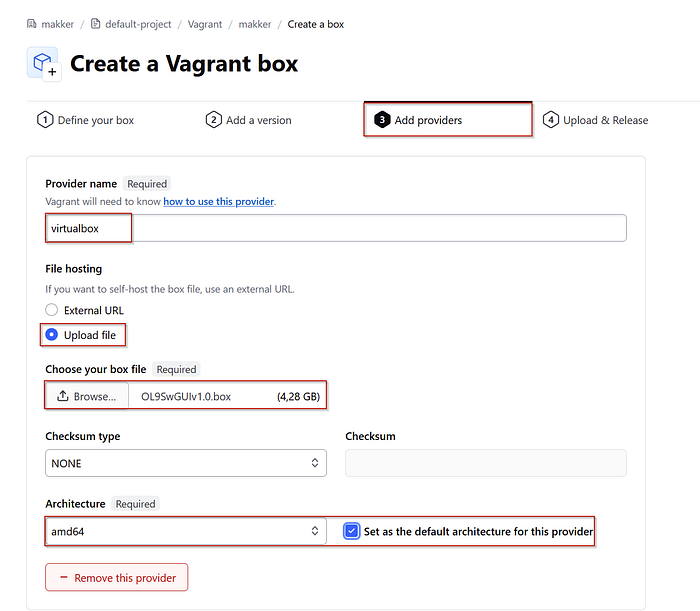
Here choose virtualbox as a provider name. You’ll have to type the literal name. Then I choose for Upload file under File hosting. And choose my newly created box. Now, I should have calculated a Checksum hash. Which I didn’t for this article. I choose amd64 as the Architecture. Since, I work on a nice Windows Dell laptop. Then Click on the Save button (which didn’t fit on my screen dump, sorry).
This brings you to the 4 Upload & Release pane, where the upload should start:
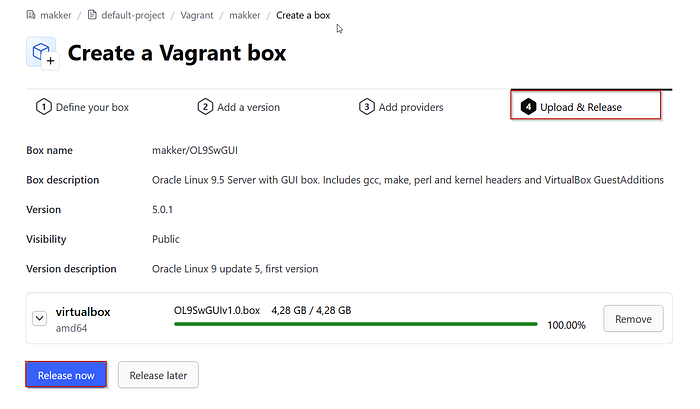
Then click on Release.
Create a VM out of it
Now, having the box released, you can create a new VM out of it. Simply create a new folder, cd into it and initialize the Vagrant project:
c:\data\git\makker\vagrant>mkdir ol9swgui
c:\data\git\makker\vagrant>cd ol9_swgui
c:\data\git\makker\vagrant\ol9_swgui>vagrant init makker/OL9SwGUI --box-version 5.0.1
A `Vagrantfile` has been placed in this directory. You are now
ready to `vagrant up` your first virtual environment! Please read
the comments in the Vagrantfile as well as documentation on
`vagrantup.com` for more information on using Vagrant.
Then run vagrant up:
c:\data\git\makker\vagrant\ol9_swgui>vagrant up
Bringing machine 'default' up with 'virtualbox' provider...
==> default: Box 'makker/OL9SwGUI' could not be found. Attempting to find and install...
    default: Box Provider: virtualbox
    default: Box Version: 5.0.1
...
In my case, unfortunately, it finds that the VirtualBox Guest Additions are installed, but not running:
[default] GuestAdditions seems to be installed (7.0.20) correctly, but not running.
Redirecting to /bin/systemctl start vboxadd.service
Redirecting to /bin/systemctl start vboxadd-service.service
VirtualBox Guest Additions: Starting.
VirtualBox Guest Additions: Setting up modules
VirtualBox Guest Additions: Building the VirtualBox Guest Additions kernel
modules.  This may take a while.
VirtualBox Guest Additions: To build modules for other installed kernels, run
VirtualBox Guest Additions:   /sbin/rcvboxadd quicksetup <version>
VirtualBox Guest Additions: or
VirtualBox Guest Additions:   /sbin/rcvboxadd quicksetup all
VirtualBox Guest Additions: Building the modules for kernel
5.15.0-302.167.6.1.el9uek.x86_64.
File context for /opt/VBoxGuestAdditions-7.0.20/other/mount.vboxsf already defined, modifying instead
Restarting VM to apply changes...
==> default: Attempting graceful shutdown of VM...
==> default: Booting VM...
==> default: Waiting for machine to boot. This may take a few minutes...
==> default: Machine booted and ready!
==> default: Checking for guest additions in VM...
==> default: Mounting shared folders...
    default: C:/data/git/makker/vagrant/ol9_swgui => /vagrant
In the end it did succeed in upgrading it.
Conclusion
Although, I have one thing to sort out (why did were the VirtualBox Guest Additions not running?), in the end my VirtualBox VM did startup properly. Next is to try to install some IDEs and find out if it works properly.
At least I now have a complete and current recipe for creating a fresh Vagrant box and register it to the HCP.

